Guest Bath Remodel Part 2: The Guts

The guts of our bathroom remodel.
Week 2 was action-packed for this Guest Bath! The wire was installed for the new electrical outlets, switches, and lights, the new shower valves and copper pipe were installed, and the tub was installed!
After the #DemoDay during week 1, we uncovered a vent pipe at the back wall of the tub, where we'd planned to put a shampoo niche. Even though the contractor said we could angle the vent pipe, we placed the shampoo niche under the window instead (you can see the niche framed in the photo above).
More good news - the accent tile we chose is suitable for showers! We were originally told that it wasn't supposed to get wet, but after talking with the manufacturer, we got confirmation that it actually can get wet - it's just not supposed to be installed in hot tubs or pools!

Our accent tile - to be used as the backsplash and the feature in the shampoo niche
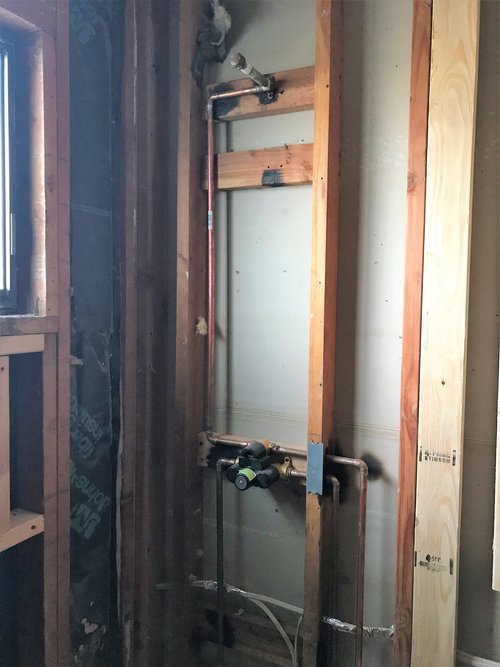
One of the most valuable, time saving, and cost saving tips I can give to homeowners is to make all of your selections/decisions before you begin construction. Yes, it's exciting to get your space remodeled ASAP, but not being prepared ahead of time can increase the construction schedule and increase the budget. When you're planning a bathroom remodel, I always advise you select and purchase your plumbing fixtures at least 4 weeks before the start of construction. As you can see in the photo above, the shower valve is one of the very first things installed on the job - right after demolition is complete. If these homeowners hadn't selected their shower/tub components, the job would have come to a complete standstill, and they may have incurred additional costs for shipping. Not every product is 100% stocked, so if you have to order anything, it's best to do it well in advance so you can be sure you receive the right product and you don't have to pay for rush shipping.
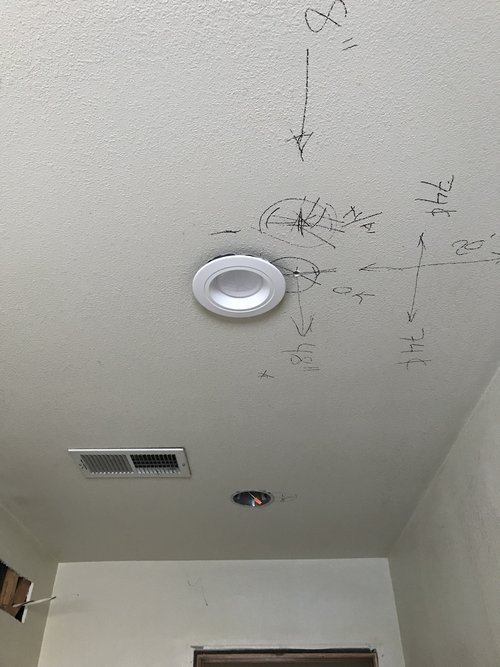
Another challenge on the job site is laying out the lighting in the ceiling. You need to have a 'Plan A' and a 'Plan B' for lighting. Recessed can lights need to be framed in the ceiling - they don't just float in space. Can light locations depend heavily on the existing ceiling framing? Most of the time, we can place can lights just about anywhere we want; however, sometimes, the ceiling framing can't be changed. It's either too costly to modify framing for the specified light location, or the structural integrity of the ceiling cannot be impacted/changed for lighting. Hence, we need to come up with the next best solution. Ideally, you never want your can lights centered right over your sink - this casts the most shadows, which is not what you want when you're getting ready in the morning. When possible, I prefer to have vanity lighting either on the sides of the mirror or mounted above the mirror and recessed can lighting - this gives you the most control over your lighting! As you can see in the photo above, our lighting layout had to be adjusted slightly due to ceiling framing.
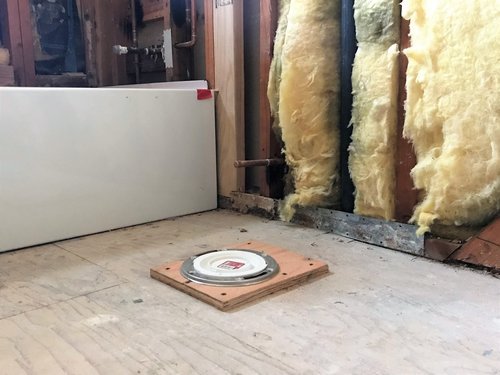
Lastly - I cannot emphasize enough how critical it is to have all of your finishes/materials chosen ahead of time! The last photo shows the small height change in the toilet waste line connection. This is a small change that makes the biggest difference. The new flooring in the bathroom is a beautiful stone tile, and we're having moisture-resistant floorboard installed on the bathroom floor, so to connect the toilet to the waste line (near the end of the project), the waste line needed to be raised to accommodate for these changes. The demo photos aren't as pretty as the finished spaces, but these details make all the difference.
Check out Part 3 to see the pieces start to come back together.
Ready to upgrade your own guest bath? Let’s make your bathroom dreams come true!