Guest Bath Remodel Part 5: Tile Brings the Bath to Life

Watch as this tile starts to bring life to our bathroom remodel!
The hall bath began to feel like a bathroom again once the tile started going in! As simple as setting tile seems, a lot of planning and detail goes into this part of the project. In this hall bath, the floor tile is a honed 16"x 16" limestone tile, and the shower wall tile is a polished 12" x 12" limestone tile, and the layout is very precise. We wanted the natural stone's beauty to be a focal point, so that meant laying out the tile so we minimized the amount of cuts, using as many full tiles as possible, rather than having random small cuts of tile throughout the shower walls.
To add visual interest, the homeowners decided to install the shower wall tile on a half stagger, also called a 'subway' or 'brick lay' pattern. The floor tile was installed in a straight set, meaning the grout joints all line-up. We were working with a fantastic tile setter, who created a simple and beautiful 4" tile border accent on the bath floor!

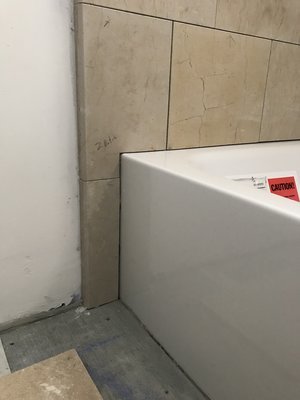
One key tile detail that is often overlooked, is how the exposed edges are treated. When tile is cut to the necessary sizes, say for this shampoo niche, if you don't select an edge treatment, often times you will end up just seeing the cut face/edge of the tile. Here, we requested the exposed edges of the tile have a bullnose finish, so we don't have any sharp edges. Since this tile is a natural stone, the color and veining go all the way through the tile, so this treatment could be done on site. If you are using a porcelain or ceramic tile, you would most likely need to order factory finished bullnose edges.

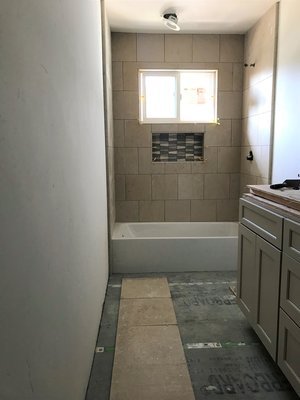
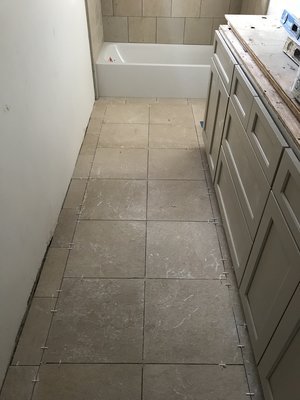
Once the shower wall tile layout was complete, the bath floor tile layout began. The floor tiles were set from the hallway to the tub so we could maximize the full-size tiles and determine the size for the floor border. Designing the floor border gave us the opportunity to use the pieces of tile that were cut that would have otherwise been considered waste.
Check out Part 6 as we begin grouting the tile, installing the countertop, and then the backsplash!
What did you learn about tile from this post? Do you have questions? Send 'em my way!